How to Set Up an Email Account on Windows 7
On Windows 10, the out-of-box experience (OOBE) is the process that takes you through the final steps to prepare the device with the correct language configuration, account, and privacy settings. Although the experience offers an easy to follow set of instructions, it has been designed to lure users into completing the setup with a Microsoft account, not a traditional local account.
The main reason is that Microsoft wants you to use additional benefits that the cloud-enabled account unlocks. For example, this account type lets you seamlessly interact with Microsoft's services. You can sync settings and files across your Windows 10 devices. You can monitor the health and manage various aspects of your devices, including personal information, password, and you can even find your computer if lost or stolen.
However, if you prefer the traditional local account experience for simplicity, security, or privacy concerns, you can still set up Windows 10 after a clean install or on a new device with an offline account. You just need to know where the option is buried, which will depend on whether you are using the Home or Pro edition of the OS.
In this Windows 10 guide, we'll walk you through the steps to set up Windows 10 with a local account through out-of-box experience.
- How to set up local account during Windows 10 Pro setup
- How to set up local account during Windows 10 Home setup
How to set up local account during Windows 10 Pro setup
To set up a new installation of Windows 10 with a local account, while in the out-of-box experience, use these steps:
-
Select your region.
 Source: Windows Central
 - Click the Yes button.
-
Select your keyboard layout.
 Source: Windows Central
 - Click the Yes button.
-
Click the Skip button.
Quick note: If you are not using a wired network connection, you'll have to sign in to the wireless network.
-
Select the Set up for personal use option.
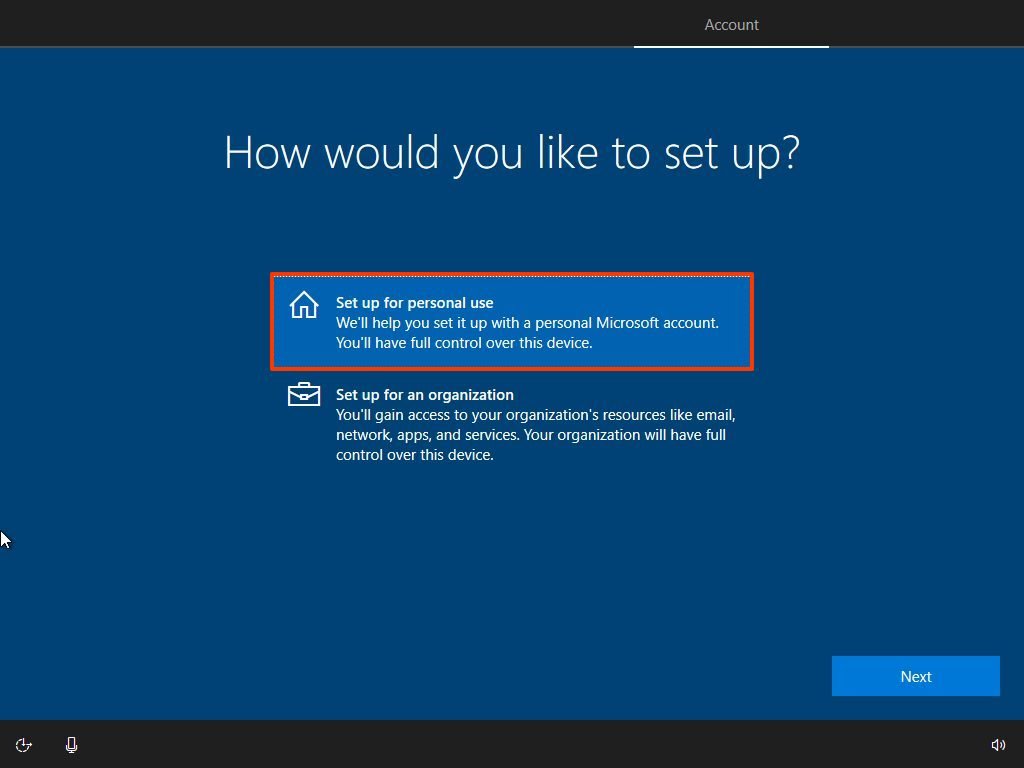 Source: Windows Central
 - Click the Next button.
-
Click the Offline account option at the bottom left corner.
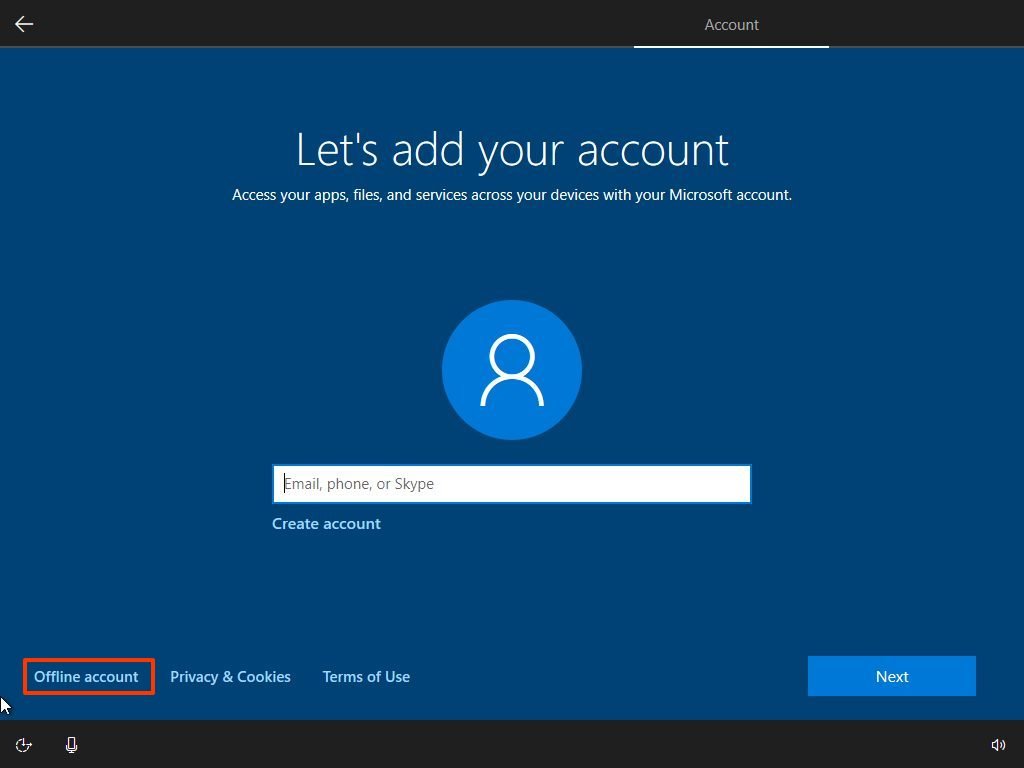 Source: Windows Central
 -
Click the Limited experience option at the bottom left corner.
 Source: Windows Central
 -
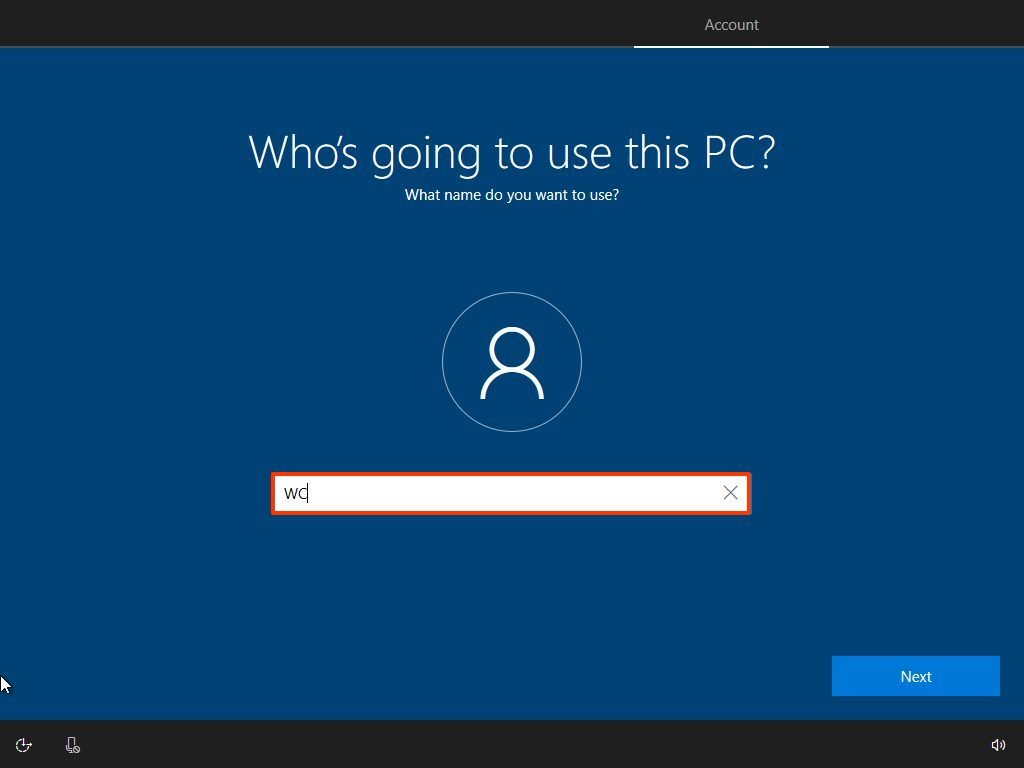
Confirm the name of the local account.
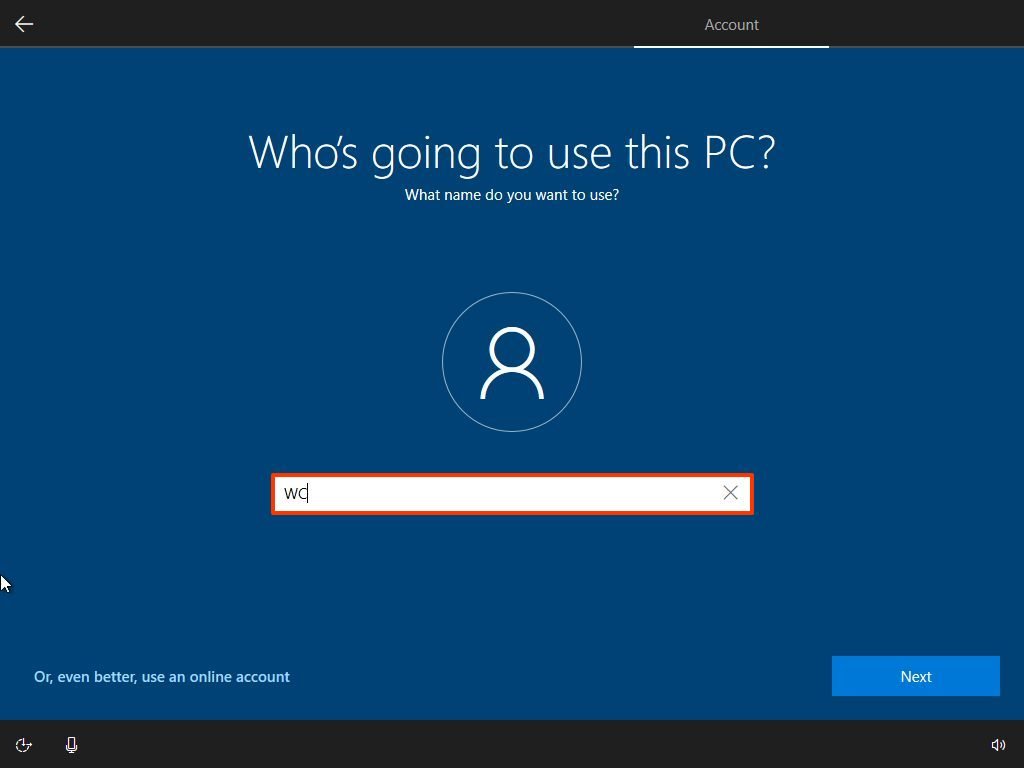 Source: Windows Central
 - Click the Next button.
-
Create a password for the account.
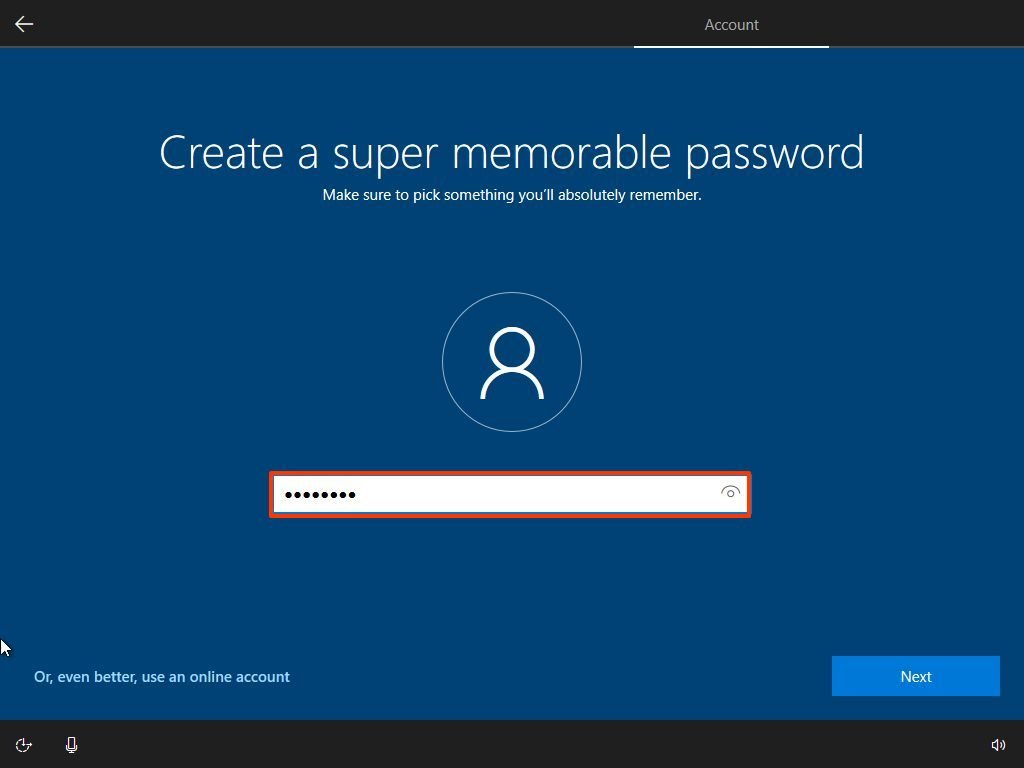 Source: Windows Central
 - Click the Next button.
-
Confirm the account password.
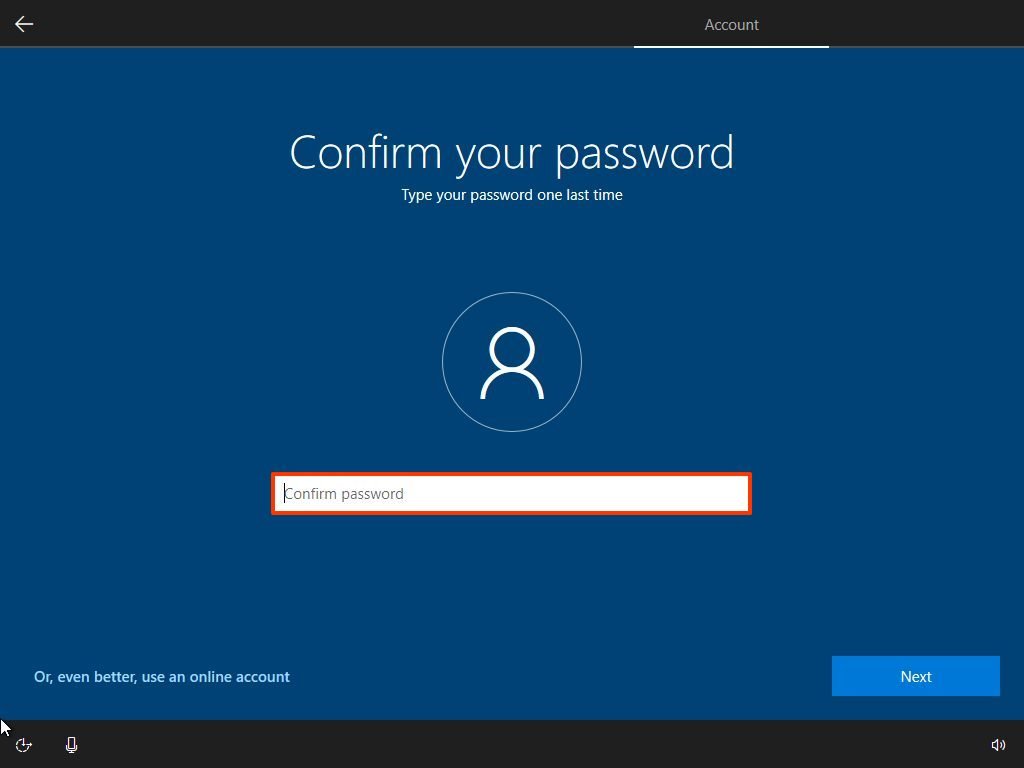 Source: Windows Central
 - Click the Next button.
-
Create three security questions that will help to reset the Windows 10 account password in case you forget it.
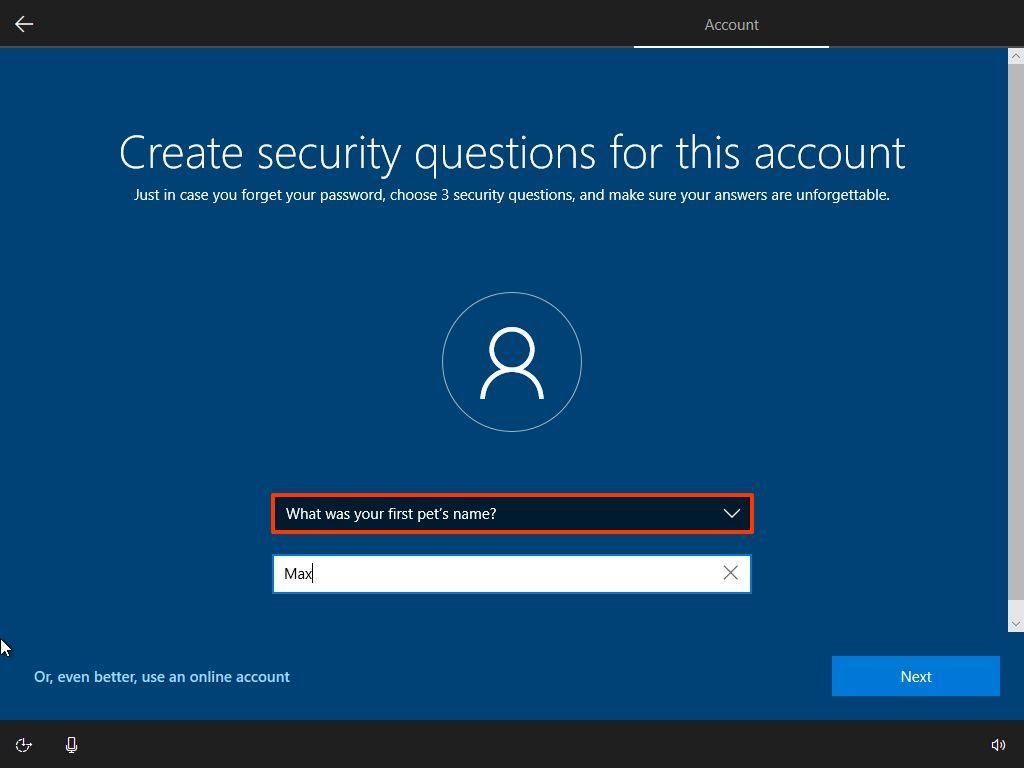 Source: Windows Central
 - Click the Next button after answering each question.
- Select your privacy settings (and don't forget to scroll down the page to review all the available settings).
-
Click the Accept button.
 Source: Windows Central
 -
(Optional) Click the Yes button to enable Timeline on your account.
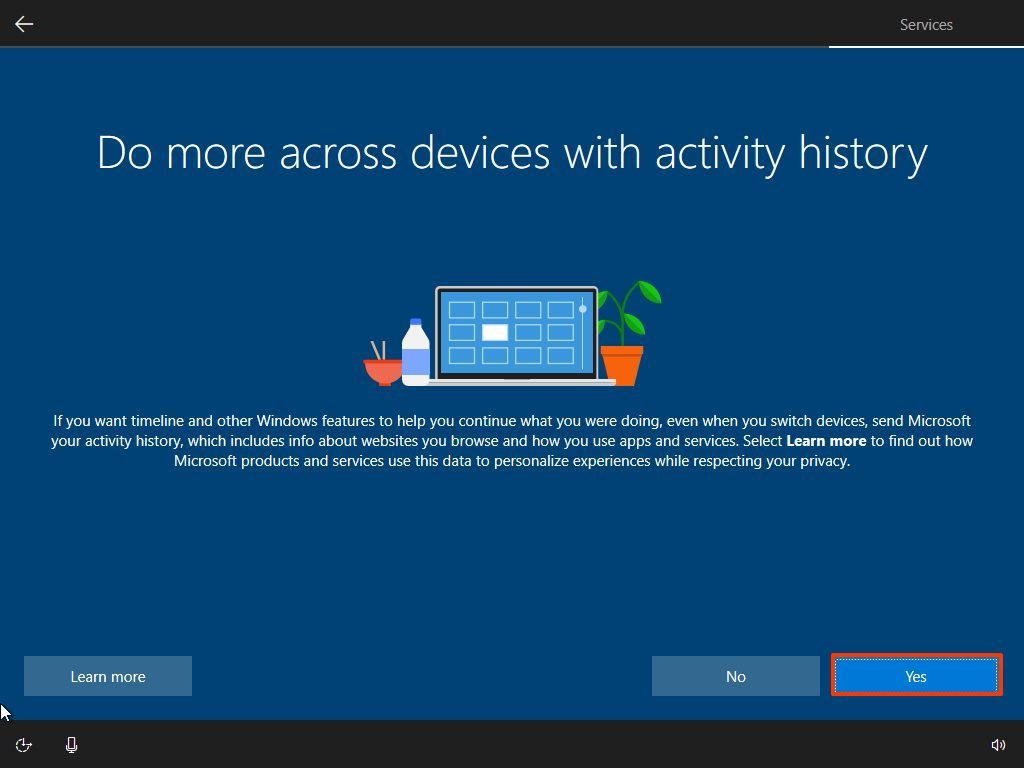 Source: Windows Central
 Quick note: Since you are setting up Windows 10 with a local account, Timeline will only show activities from the last four days, and the information won't roam across devices.
-
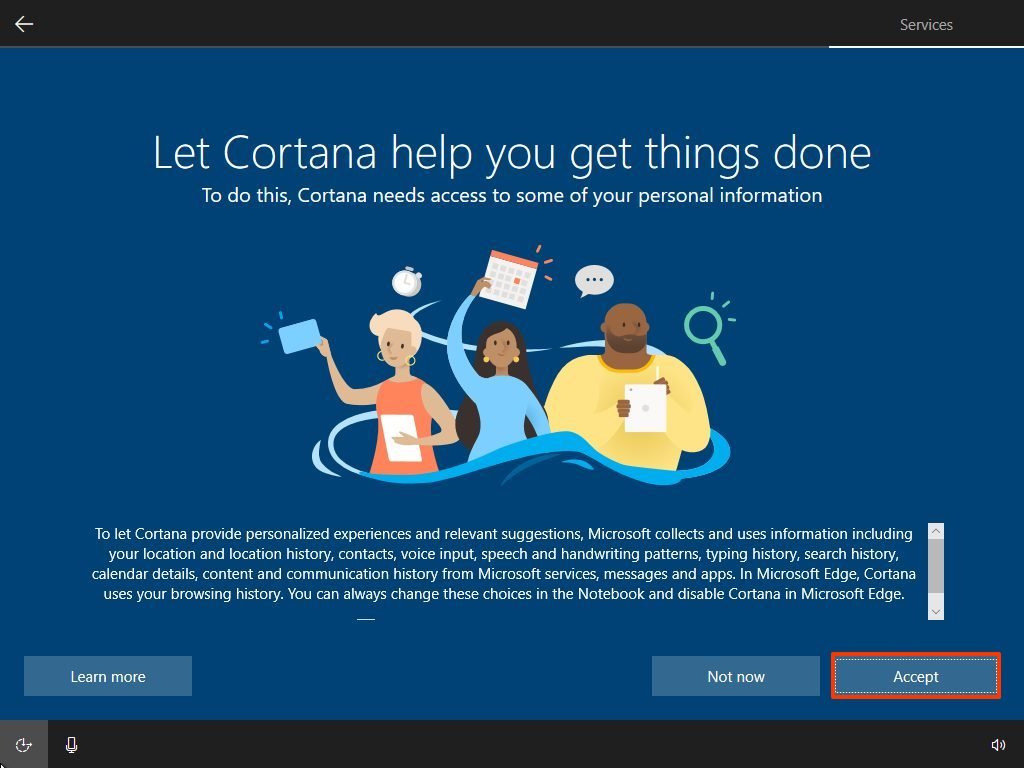
Click the Accept button to allow Microsoft to collect personal information to make Cortana more personal. If you are not interested in the digital assistant, click the Not now button to continue.
 Source: Windows Central


Once you complete the steps, you can start using the device without a Microsoft account.
How to set up local account during Windows 10 Home setup
If you are setting up a new device with the Home edition of Windows 10, the steps will be slightly different since Microsoft has deleted the option from the OOBE setup.
To set up a new device with a local account running Windows 10 Home, use these steps:
-
Select your region.
Source: Windows Central - Click the Yes button.
-
Select your keyboard layout.
Source: Windows Central - Click the Yes button.
- Click the Skip button.
-
Disconnect the device from the network.
Quick tip: If you are using an Ethernet connection, disconnect the cable from the back of your computer. If you are using a wireless connection, turn off the adapter using the shortcut on your laptop. (In the case that there's no way to disable the Wi-Fi adapter, then restart your computer, and skip the network connection step.)
-
Click the back button from the top-left corner.
 Source: Windows Central
 -
Confirm the name of the local account.
 Source: Windows Central
 - Click the Next button.
-
Create a password for the account.
Source: Windows Central - Click the Next button.
-
Confirm the account password.
Source: Windows Central - Click the Next button.
-
Create three security questions that will help to reset the Windows 10 account password in case you forget it.
Source: Windows Central - Click the Next button after answering each question.
- Select your privacy settings (and don't forget to scroll down the page to review all the available settings).
-
Click the Accept button.
Source: Windows Central -
(Optional) Click the Yes button to enable Timeline on your account.
Source: Windows Central -
Click the Accept button to allow Microsoft to collect personal information to make Cortana more personal. If you are not interested in the digital assistant, click the Not now button to continue.
Source: Windows Central


After you complete the steps, reconnect the computer to the network, and you can now start using the Home edition of Windows 10 with a local account.
More Windows 10 resources
For more helpful articles, coverage, and answers to common questions about Windows 10, visit the following resources:
- Windows 10 on Windows Central – All you need to know
- Windows 10 help, tips, and tricks
- Windows 10 forums on Windows Central
How to Set Up an Email Account on Windows 7
Source: https://www.windowscentral.com/how-set-windows-10-local-account